DIY Eurorack: Voltage-Controlled Amplifier
After finishing my osciliator, the next logical step was a voltage-controlled amplifier (VCA), to control the amplitude of my oscilator (via voltage of course). Without the VCA, I could only control the pitch of my VCO, but not when the sound starts and stops. There are other uses of VCAs, but this was my primary goal.
SPOILER: This build was only partly successful, but more on that later.
Steps 1 & 2: Schematic and Stripboard Layout
One of the easier approaches to VCAs (as far as I could tell) was to use an operational transconductance amplifier (OTA), which to selectively quote Wikipedia, is “an amplifier that…is…voltage controlled.” Perfect!
A common OTA in the DIY Eurorack community is the LM13700, which actually has two OTAs inside. I found this build from Hagiwo and decided to give it a shot.
Their schematic shows only one of the LM13700’s OTAs being used, so I checked the pinout online to see what pins to use on the other OTA. I put that in KiCad to make my schematic, then thru that in DIYLayoutCreator to make my stripboard layout.
At this point I’ve been re-using a template between my stripboard layouts (mainly with how I distribute power and place ICs), so these steps are a lot quicker than when I started.
Step 3: Assembly
Nothing special here, just the basic steps:
- Cut the stripboard
- Cut traces and test (lack of) continuity
- Solder all the stuff
- Connect the two boards
- Test the build
- Cut, drill, and paint the panel
- Attach the panel
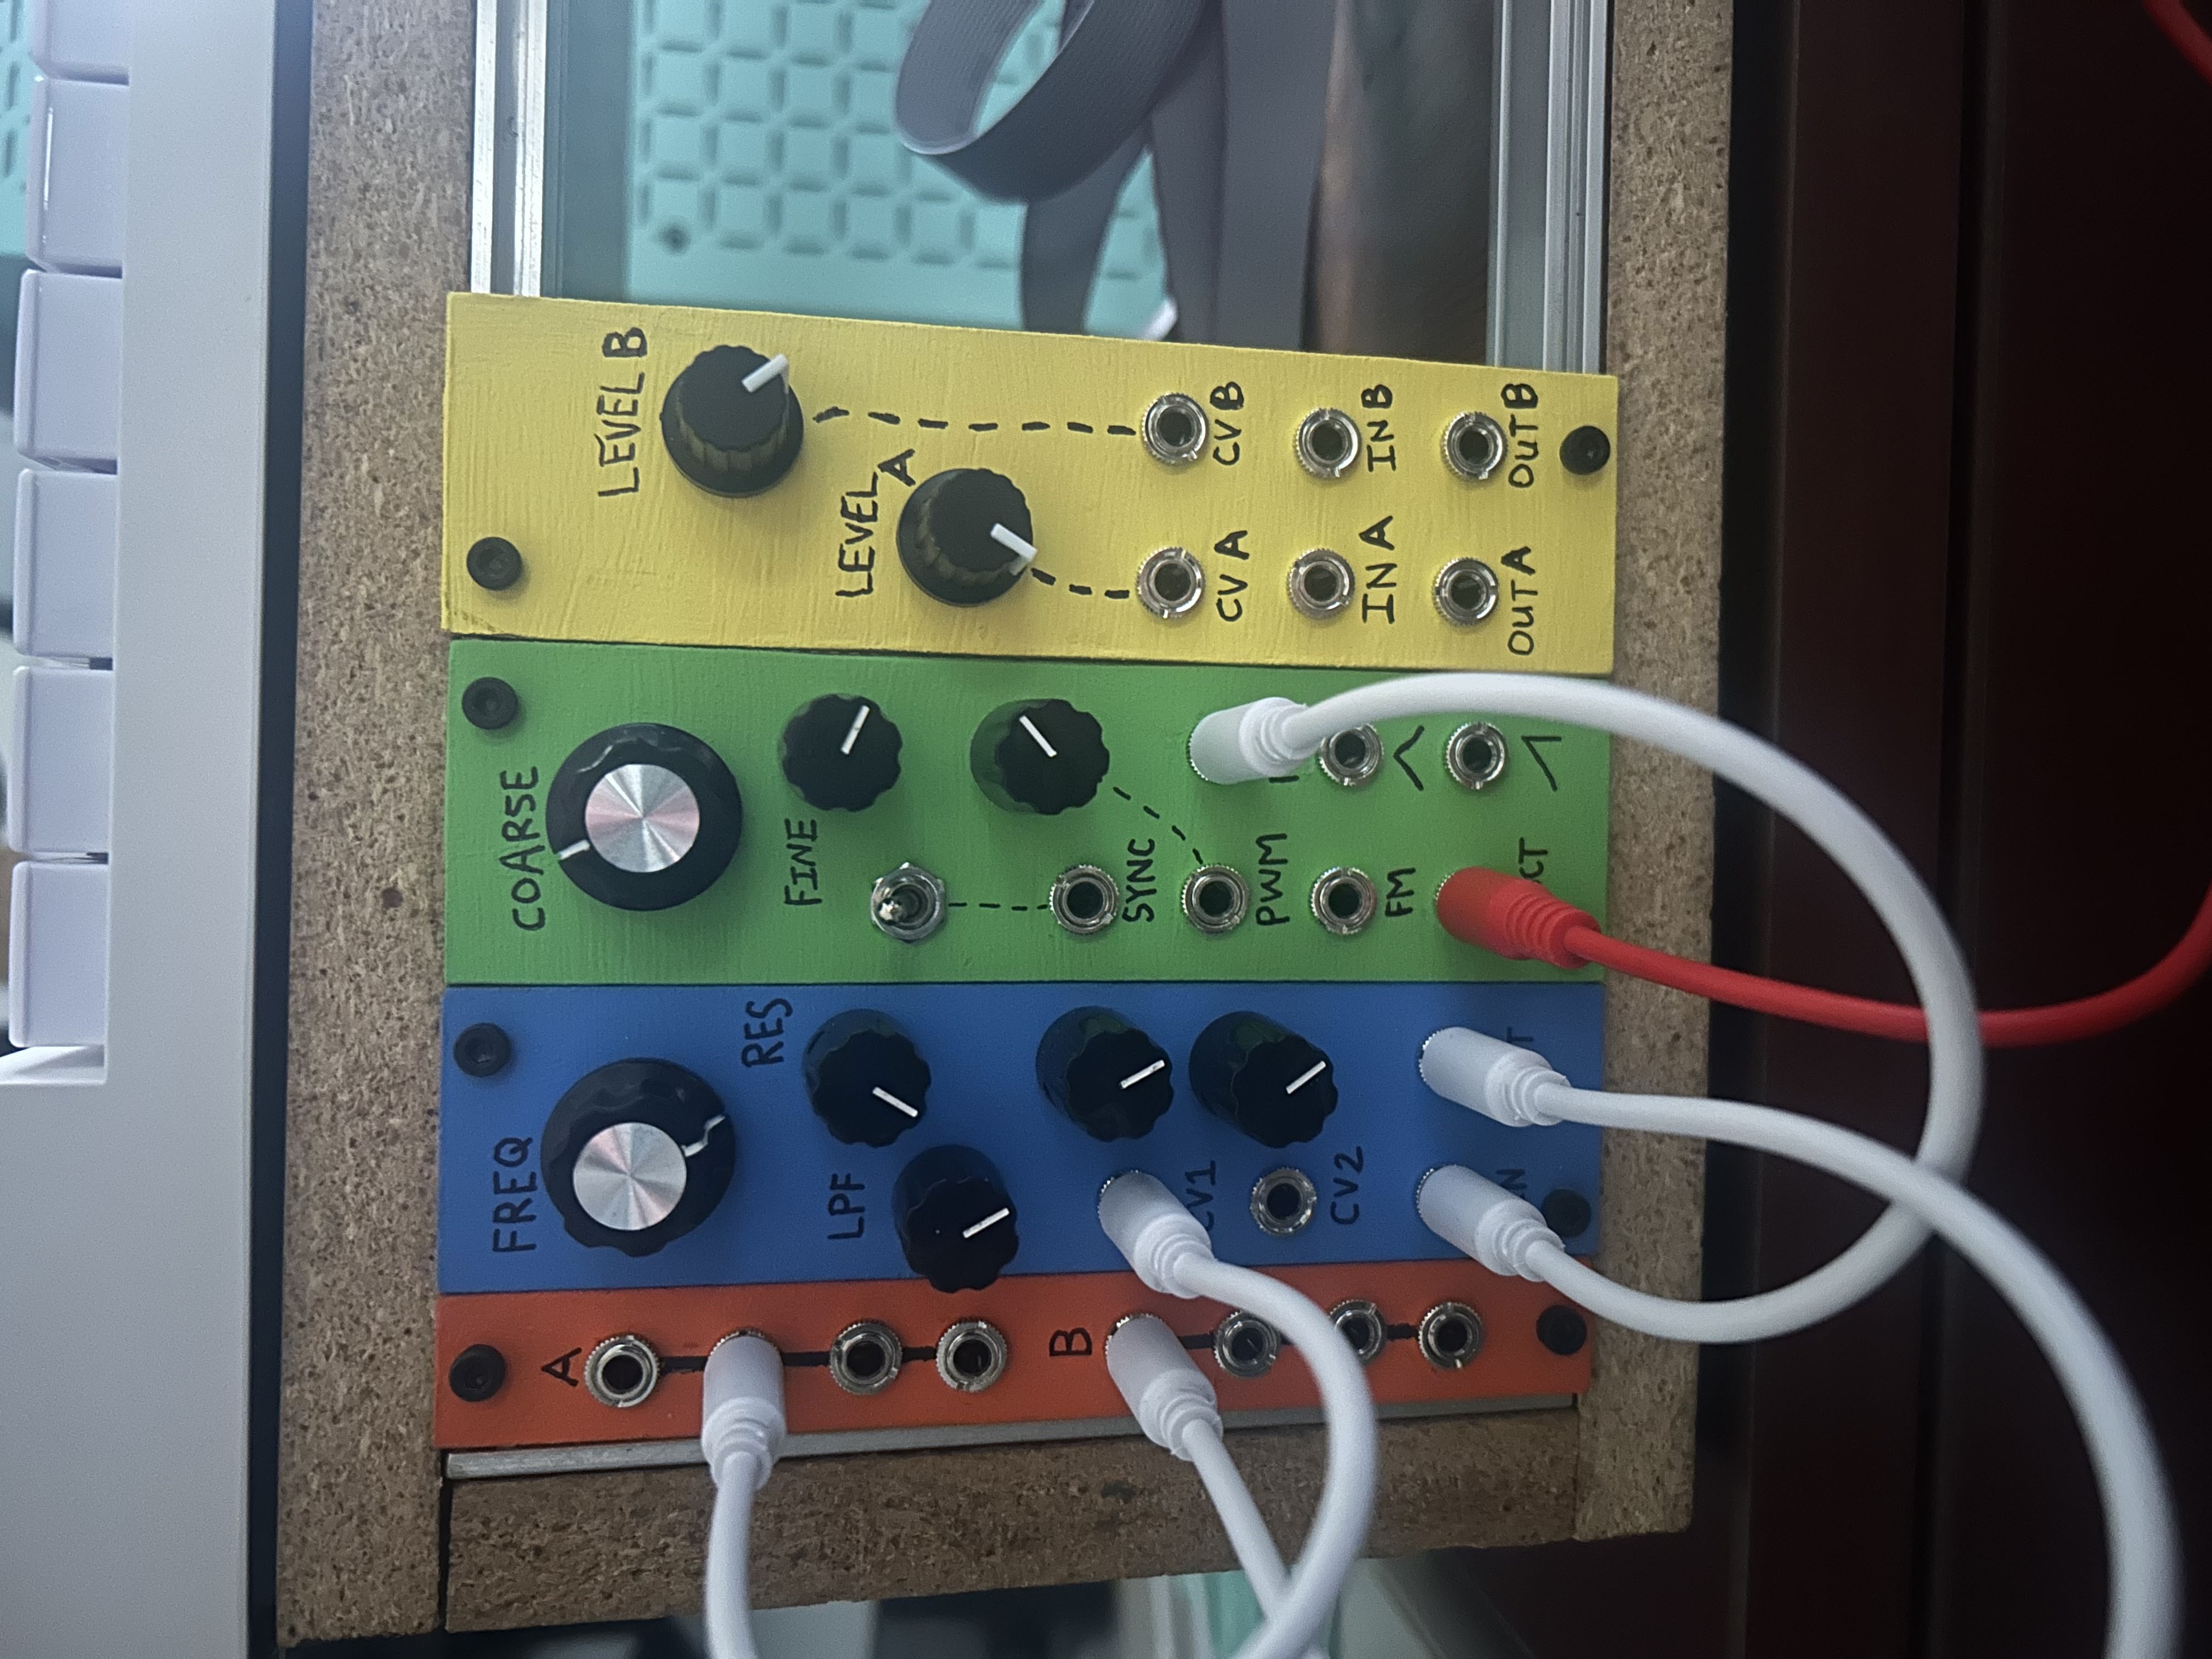
Mixed Success?
During the “test the build” step from above, I discovered two issues.
First, only one of the VCA setups worked. Side “A” would pass the input to the output, but the level control and CV input didn’t affect it at all. I checked my schematic, layout, and my soldering and saw no issues.
Luckily side “B” worked, and I really only needed one VCA to accomplish my goal. But I also noticed that the wave coming out of side B was really squarish, regardless of the saw or triangle input. This may be addressed in Hagiwo’s build article, or maybe it’s something wrong on my part.
I had come this far, so I ignored these issues and finished the build, but of course be aware of this if you’re looking to replicate this build.
Demo
Quick demo of the VCA (mostly) in action:
Specs
Size and Power Consumption
| Attribute | Value |
|---|---|
| HP | 7-ish |
| +12V | 10 mA |
| +5V | 0 mA |
| -12V | 10 mA |
Price
ICs (\$1), knobs and pots (\$1), jacks (\$1), panel (free!), other stuff = about \$5.
Read about how I’m making my panels at the bottom of this post.
Project Files
Checkout the schematic, stripboard layout, and other files here