DIY Eurorack: Case and Passive Multiple
In my previous post I built a power supply for my DIY eurorack synthesizer. Now that I can power my modules, I just need a place to house them.
DIY Case
There’s a ton of options out there for eurorack cases, and I was really tempted by cre8audio’s NiftyCase, as it’s not too expensive and has some nice built-ins (namely power and MIDI-to-CV). But I decided to keep this project as DIY as possible (and save some money).
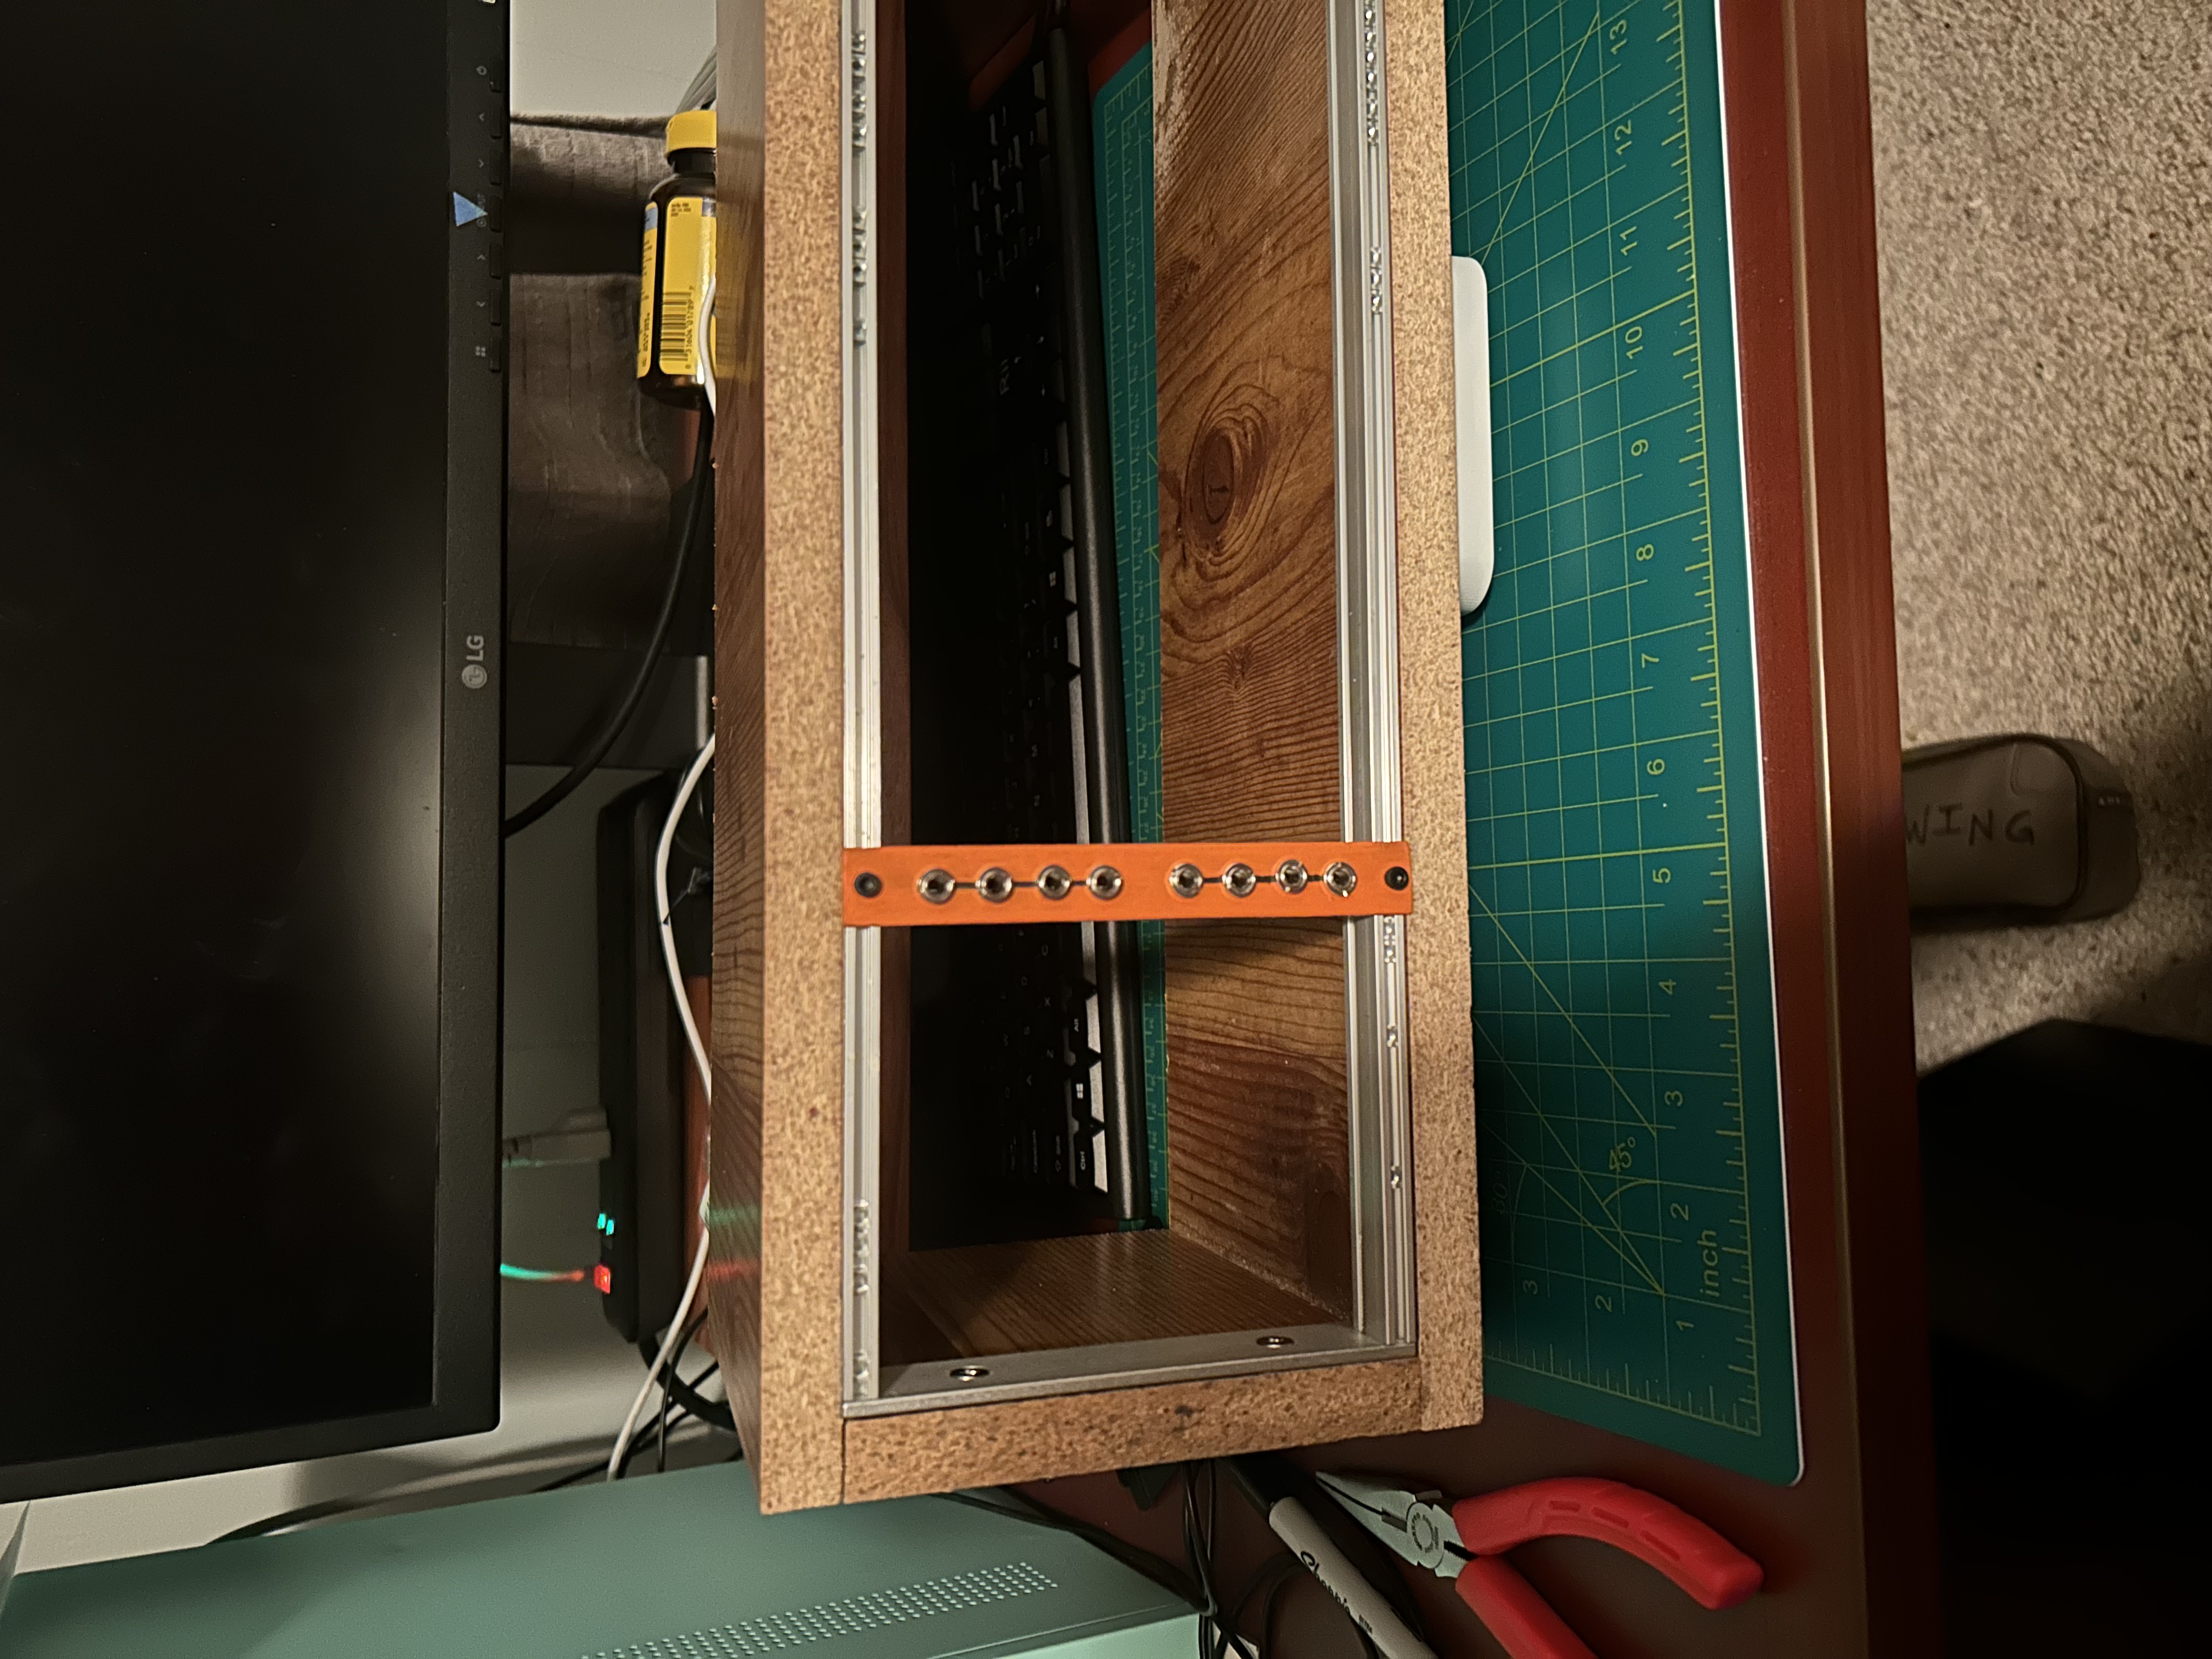
I’ve seen people online drill their modules directly into pieces of wood with no metal rails, but I was afraid that would limit my flexibility to move my modules around. So instead I ordered this rail kit and built a makeshift wooden box to house it. The “wood” is a manufactured wood material from my old desk. It has a wood veneer on the outsides so it’s kinda presentable (except for the cut edges, which I might paint later).
I had this case built in less than 30 minutes (and it shows haha), but it’ll be good enough for now!
Passive Multiple
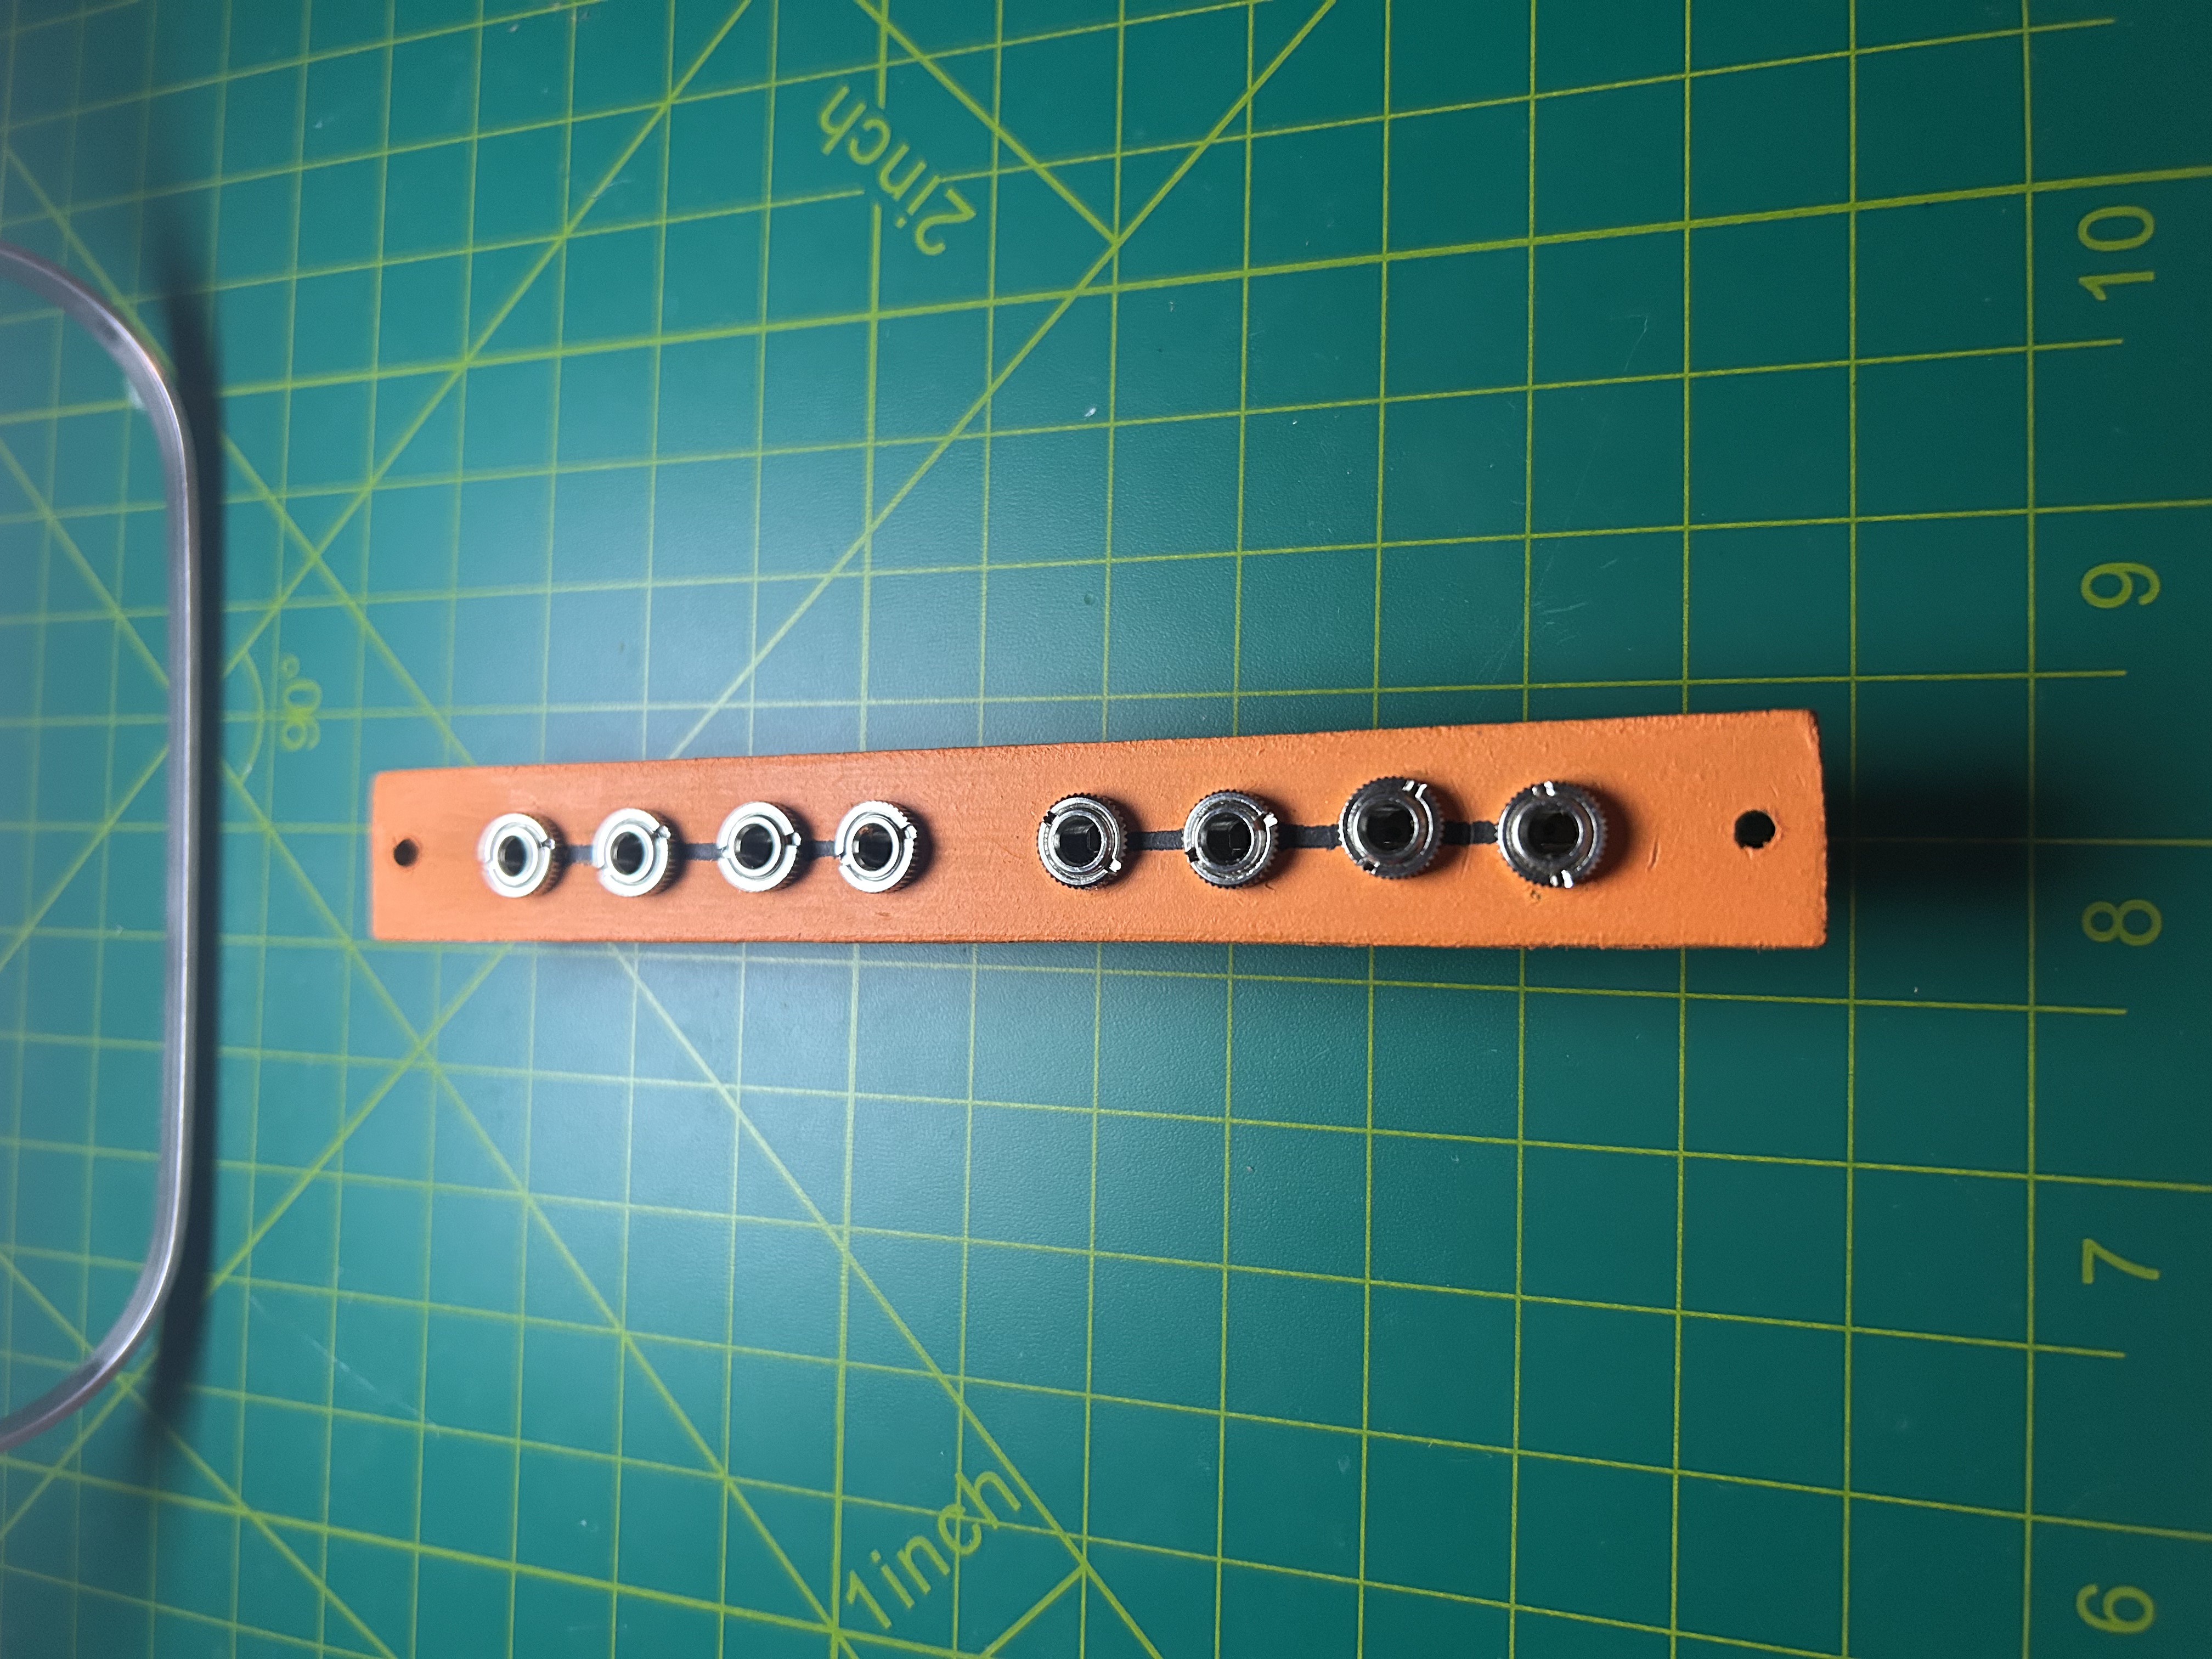
Now that I had my case, I was really excited to get a module in there. I started with the “Hello, World!” equivilant of DIY modules: the passive multiple. I don’t have any other modules planned out, but I don’t think a passive multiple would hurt, and it’s a simple module for testing some panel decisions (more on that later).
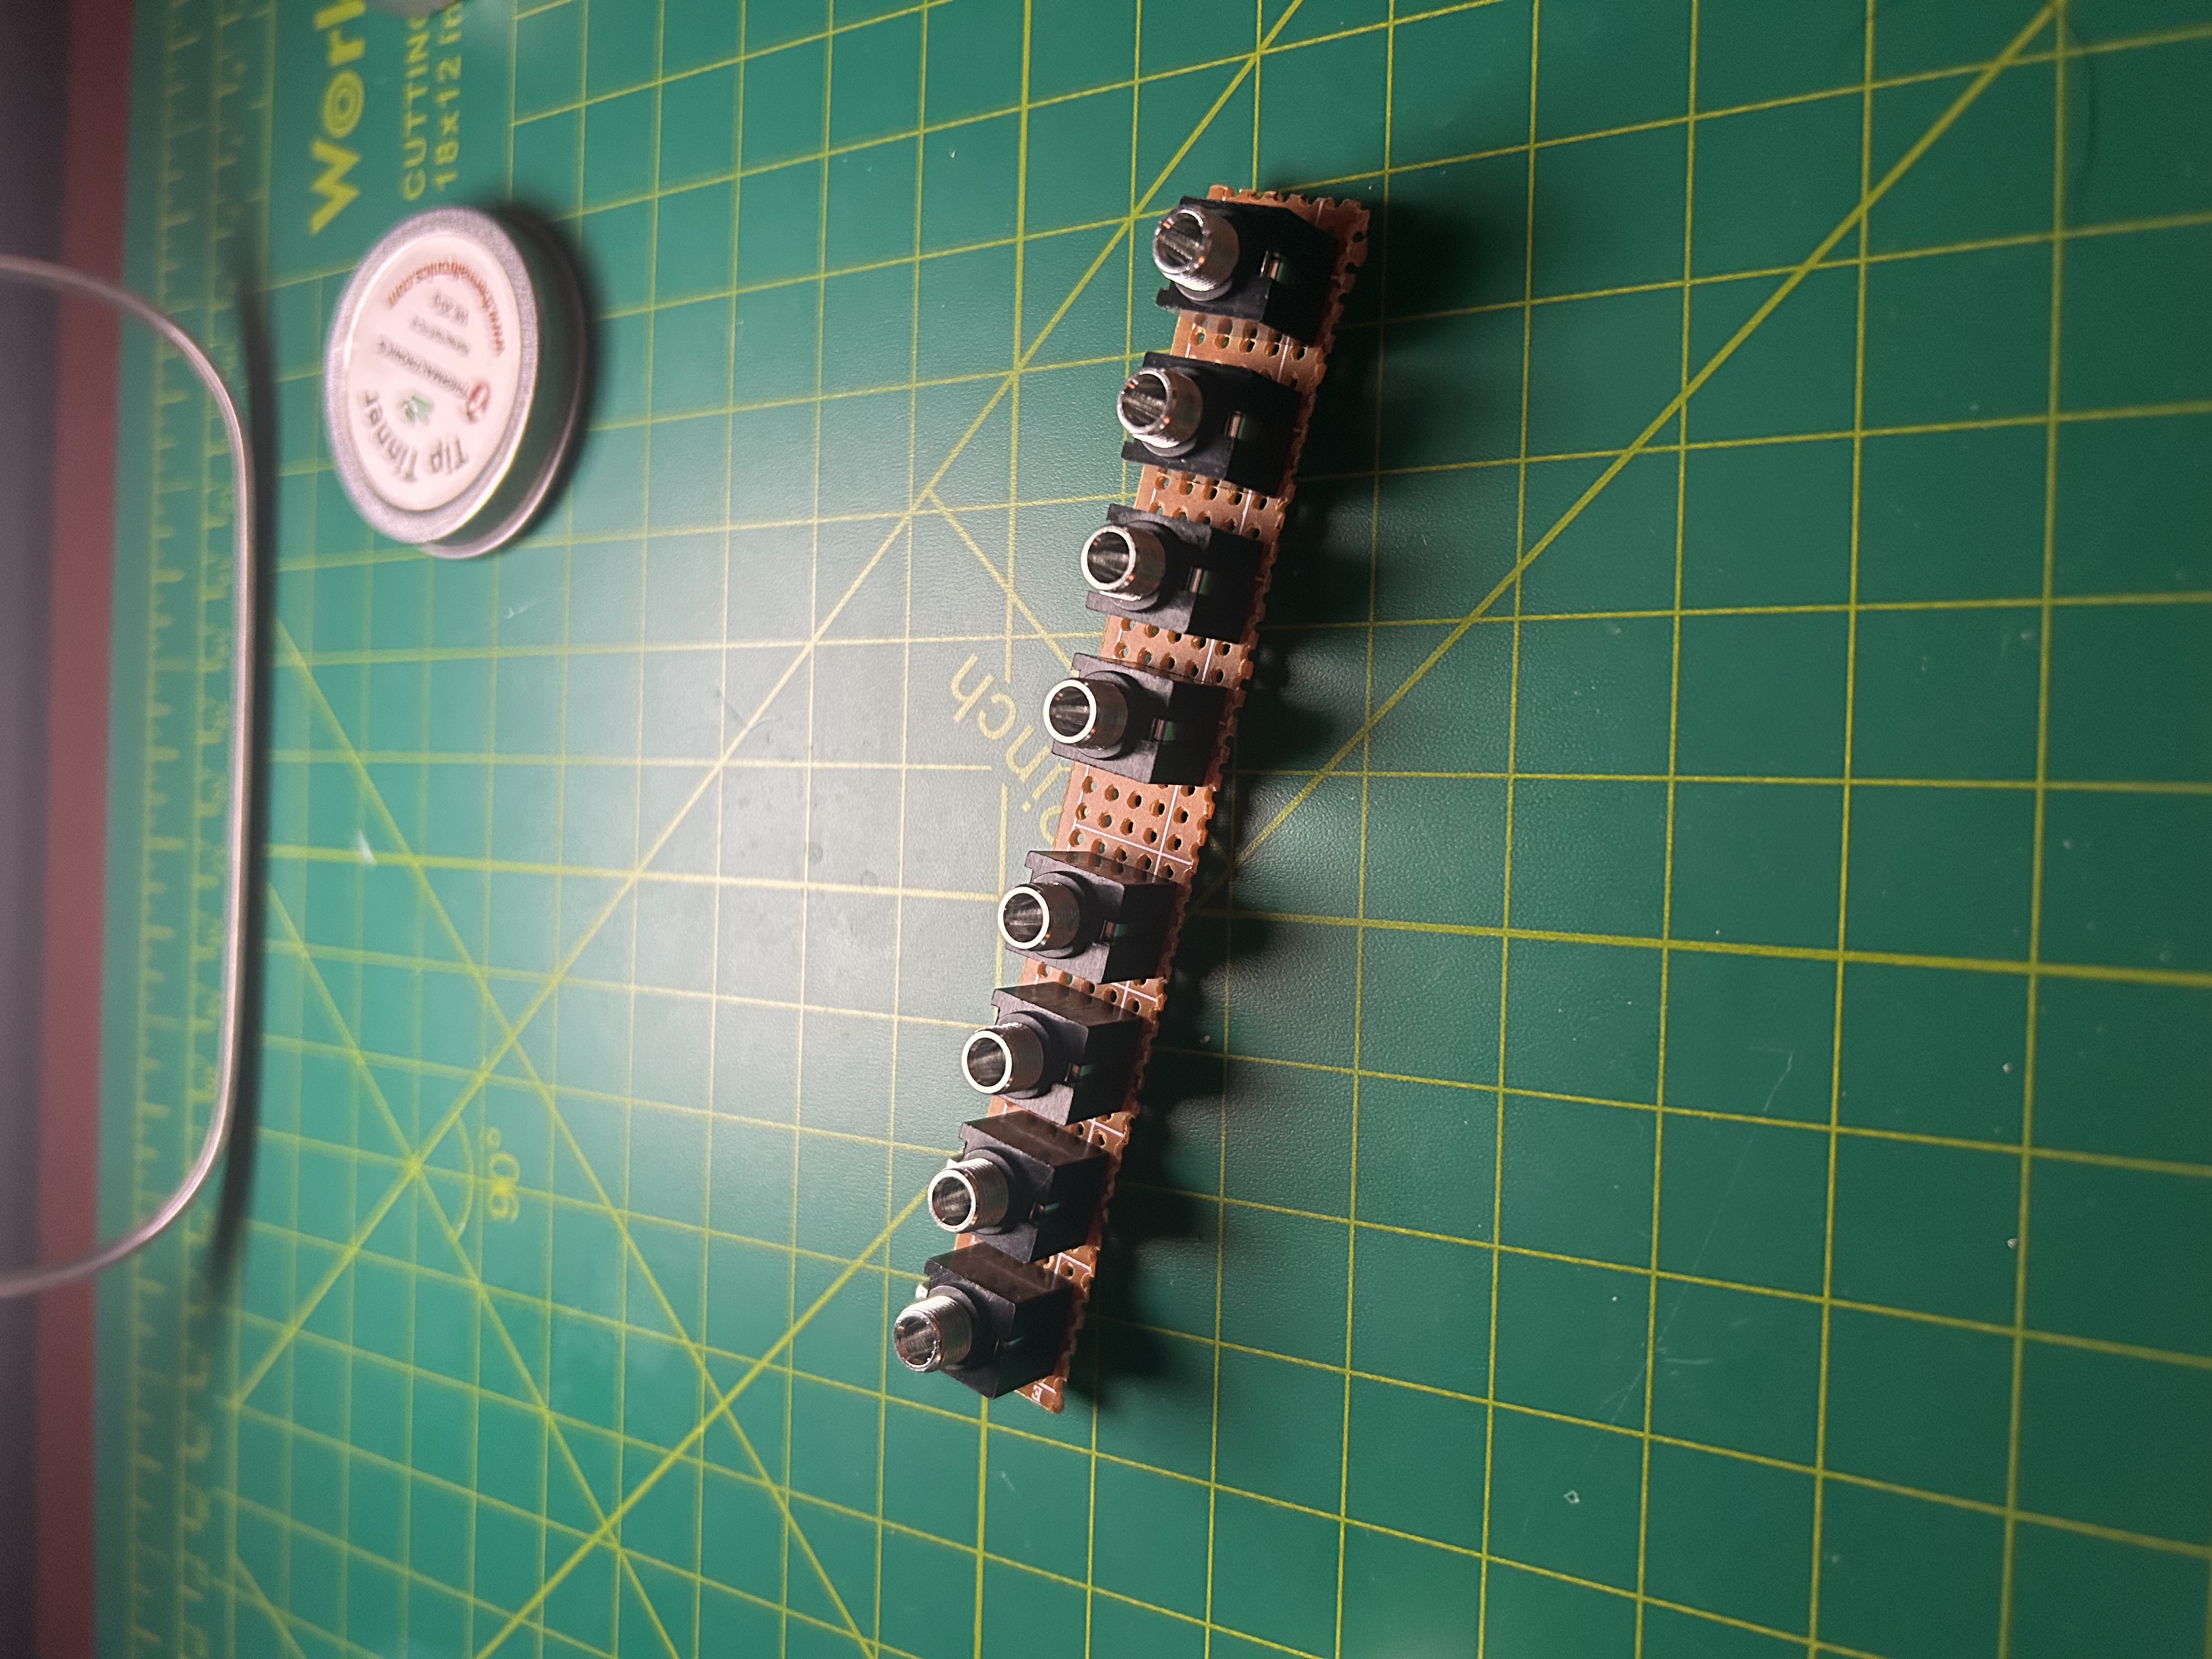
I didn’t make a schematic or stripboard layout for this because it’s so simple. I had 2 groups of 4 jacks, and connected all the grounds to each other and all the audio output leads to each other. This is ridciously easy on the stripboad, I lined up the jacks and drilled a few trace cuts to split the two groups of jacks.
Size and Power Consumption
| Attribute | Value |
|---|---|
| HP | 3ish |
| +12V | 0 mA |
| +5V | 0 mA |
| -12V | 0 mA |
Price
Jacks (\$1), stripboard (\$0.50), panel (free!) = about \$2.
Free Panel?
There are also a lot of options for front panels. I was looking into ordering blank aluminum panels from a PCB manufacturer, but once again decided to keep things cheap and “interesting”.
While building a craft at Home Depot’s Kid Workshop with my daughter, I realized the thin MDF boards used in the majority of those kits might also work as a eurorack panel. I don’t believe Home Depot actually sells this wood, so if it works well for panels, I will just salvage my daughter’s projects once she’s done playing with them (which is usually a few days, haha).
My only concerns with the material were thickness and strength.
From what I have read, modular panels are between 1.6 and 2.0mm thick, but some DIY builders have used 3.0mm wood panels. The Home Depot MDF boards were 2.9mm to 3.0mm, so they might just work. The primary concern with width is the audio jacks, and mine seemed to have enough clearance past 3.0mm to still tighten the top nut, so I gave it a go.
As for strength, I don’t want a panel snapping when putting in and pulling out patch cables, so I did a quick test. I mounted a jack in the middle of a panel (the middle being the weakest point with the most flex), and patched and unpatched a cable repeatedly. I can’t say what will happen after the 100th patch, but in my mini test it seemed strong enough. Plus, I plan to have my jacks and other components mounted to a stripboard underneath the panel, so that should add to the strength of each individual jack.
Final Product
I cut my panel and drilled my holes. I found some orange paint (the only color I could find) and did a quick paint job.
Ta-da! First DIY module complete.