DIY Vocoder Using Daisy Seed
For my first Daisy Seed project, I tried building a channel vocoder to transform my voice into an electronic/robot voice.
My project was somewhat successful. I’m new to vocoders (and DSP in general), so despite my best efforts, I think there is some logical issues in how the signals are processed (please reach out if you have any suggestions). But in hopes that this might be useful to anyone, I’ll walkthrough the steps I took to build a mildly functional vocoder with Daisy Seed.
Step 1: Build the Preamp
The Daisy Seed needs line level input. Microphones are much quieter than line level, so I needed a preamp to boost the signal strength before sending it to the Daisy.
Luckily, building a simple preamp is pretty easy, and can be done with components from a basic electronics kit.
There’s a lot of designs out there for DIY preamps. I looked at these two schematics (this one and this one) and merged them a bit, opting for components that I had on hand. Here’s what I ended up with:
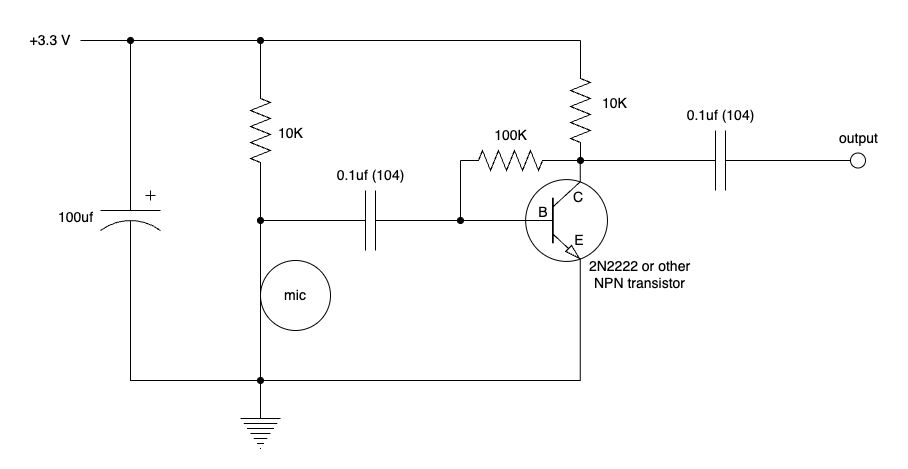
You’ll notice the voltage is 3.3 volts. I was originally testing this on a separate breadboard with a 5V input, but then switched to 3.3V so that I could use the power output from the Daisy. Having one power source for the Daisy and the preamp was easier to manage, and a smarter choice if I ever wanted to put this in an enclosure.
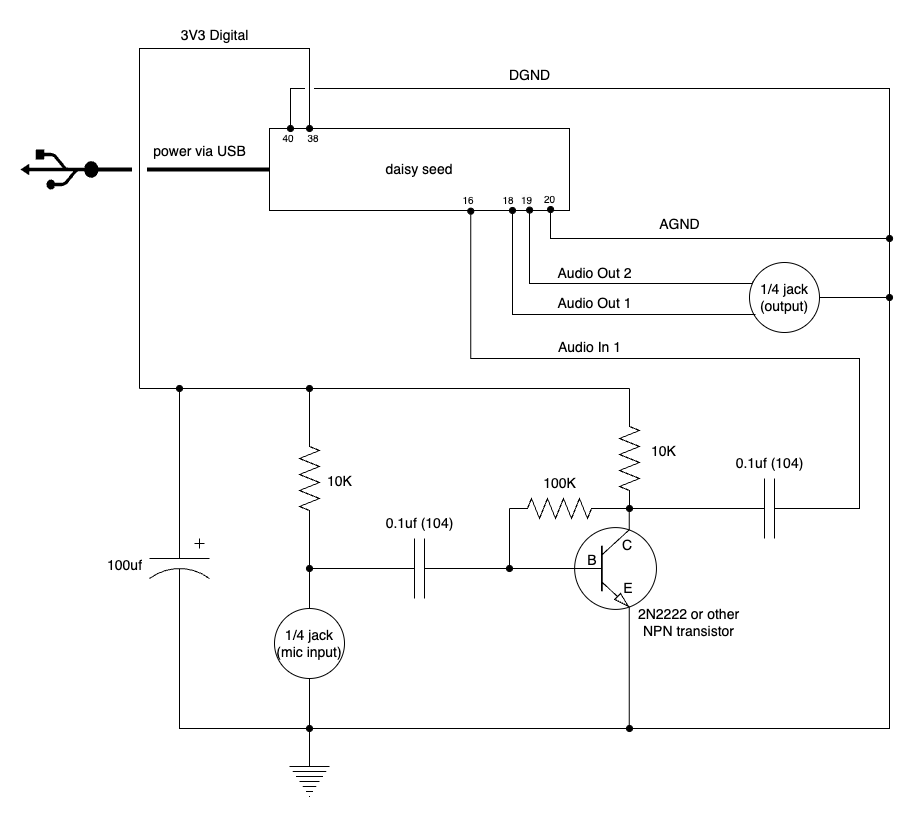
Step 2: Wire Up the Daisy
Next, I added the Daisy. I put my Daisy Seed at the top of the breadboard for easy USB access. The power and ground pins from the Daisy were connected to the pos/neg rails, which were then connected to the preamp portion on the other end of the breadboard.
Quick note on inputs and outputs: There are a lot of options here. I tested a few Daisy projects with an 8 ohm speaker for output, but eventually moved to an audio jack which is more versatile. But once again, there are a few options here too. The old microphone I had lying around uses a 1/4” connector (instead of an XLR connector), so I used a 1/4” jack for the input as well as the output. I briefly used a 3.5mm jack for the output (which works nicely with headphones), but using 1/4” jack and a adding a 3.5mm-to-1/4”-converter seemed to be the best of both worlds.
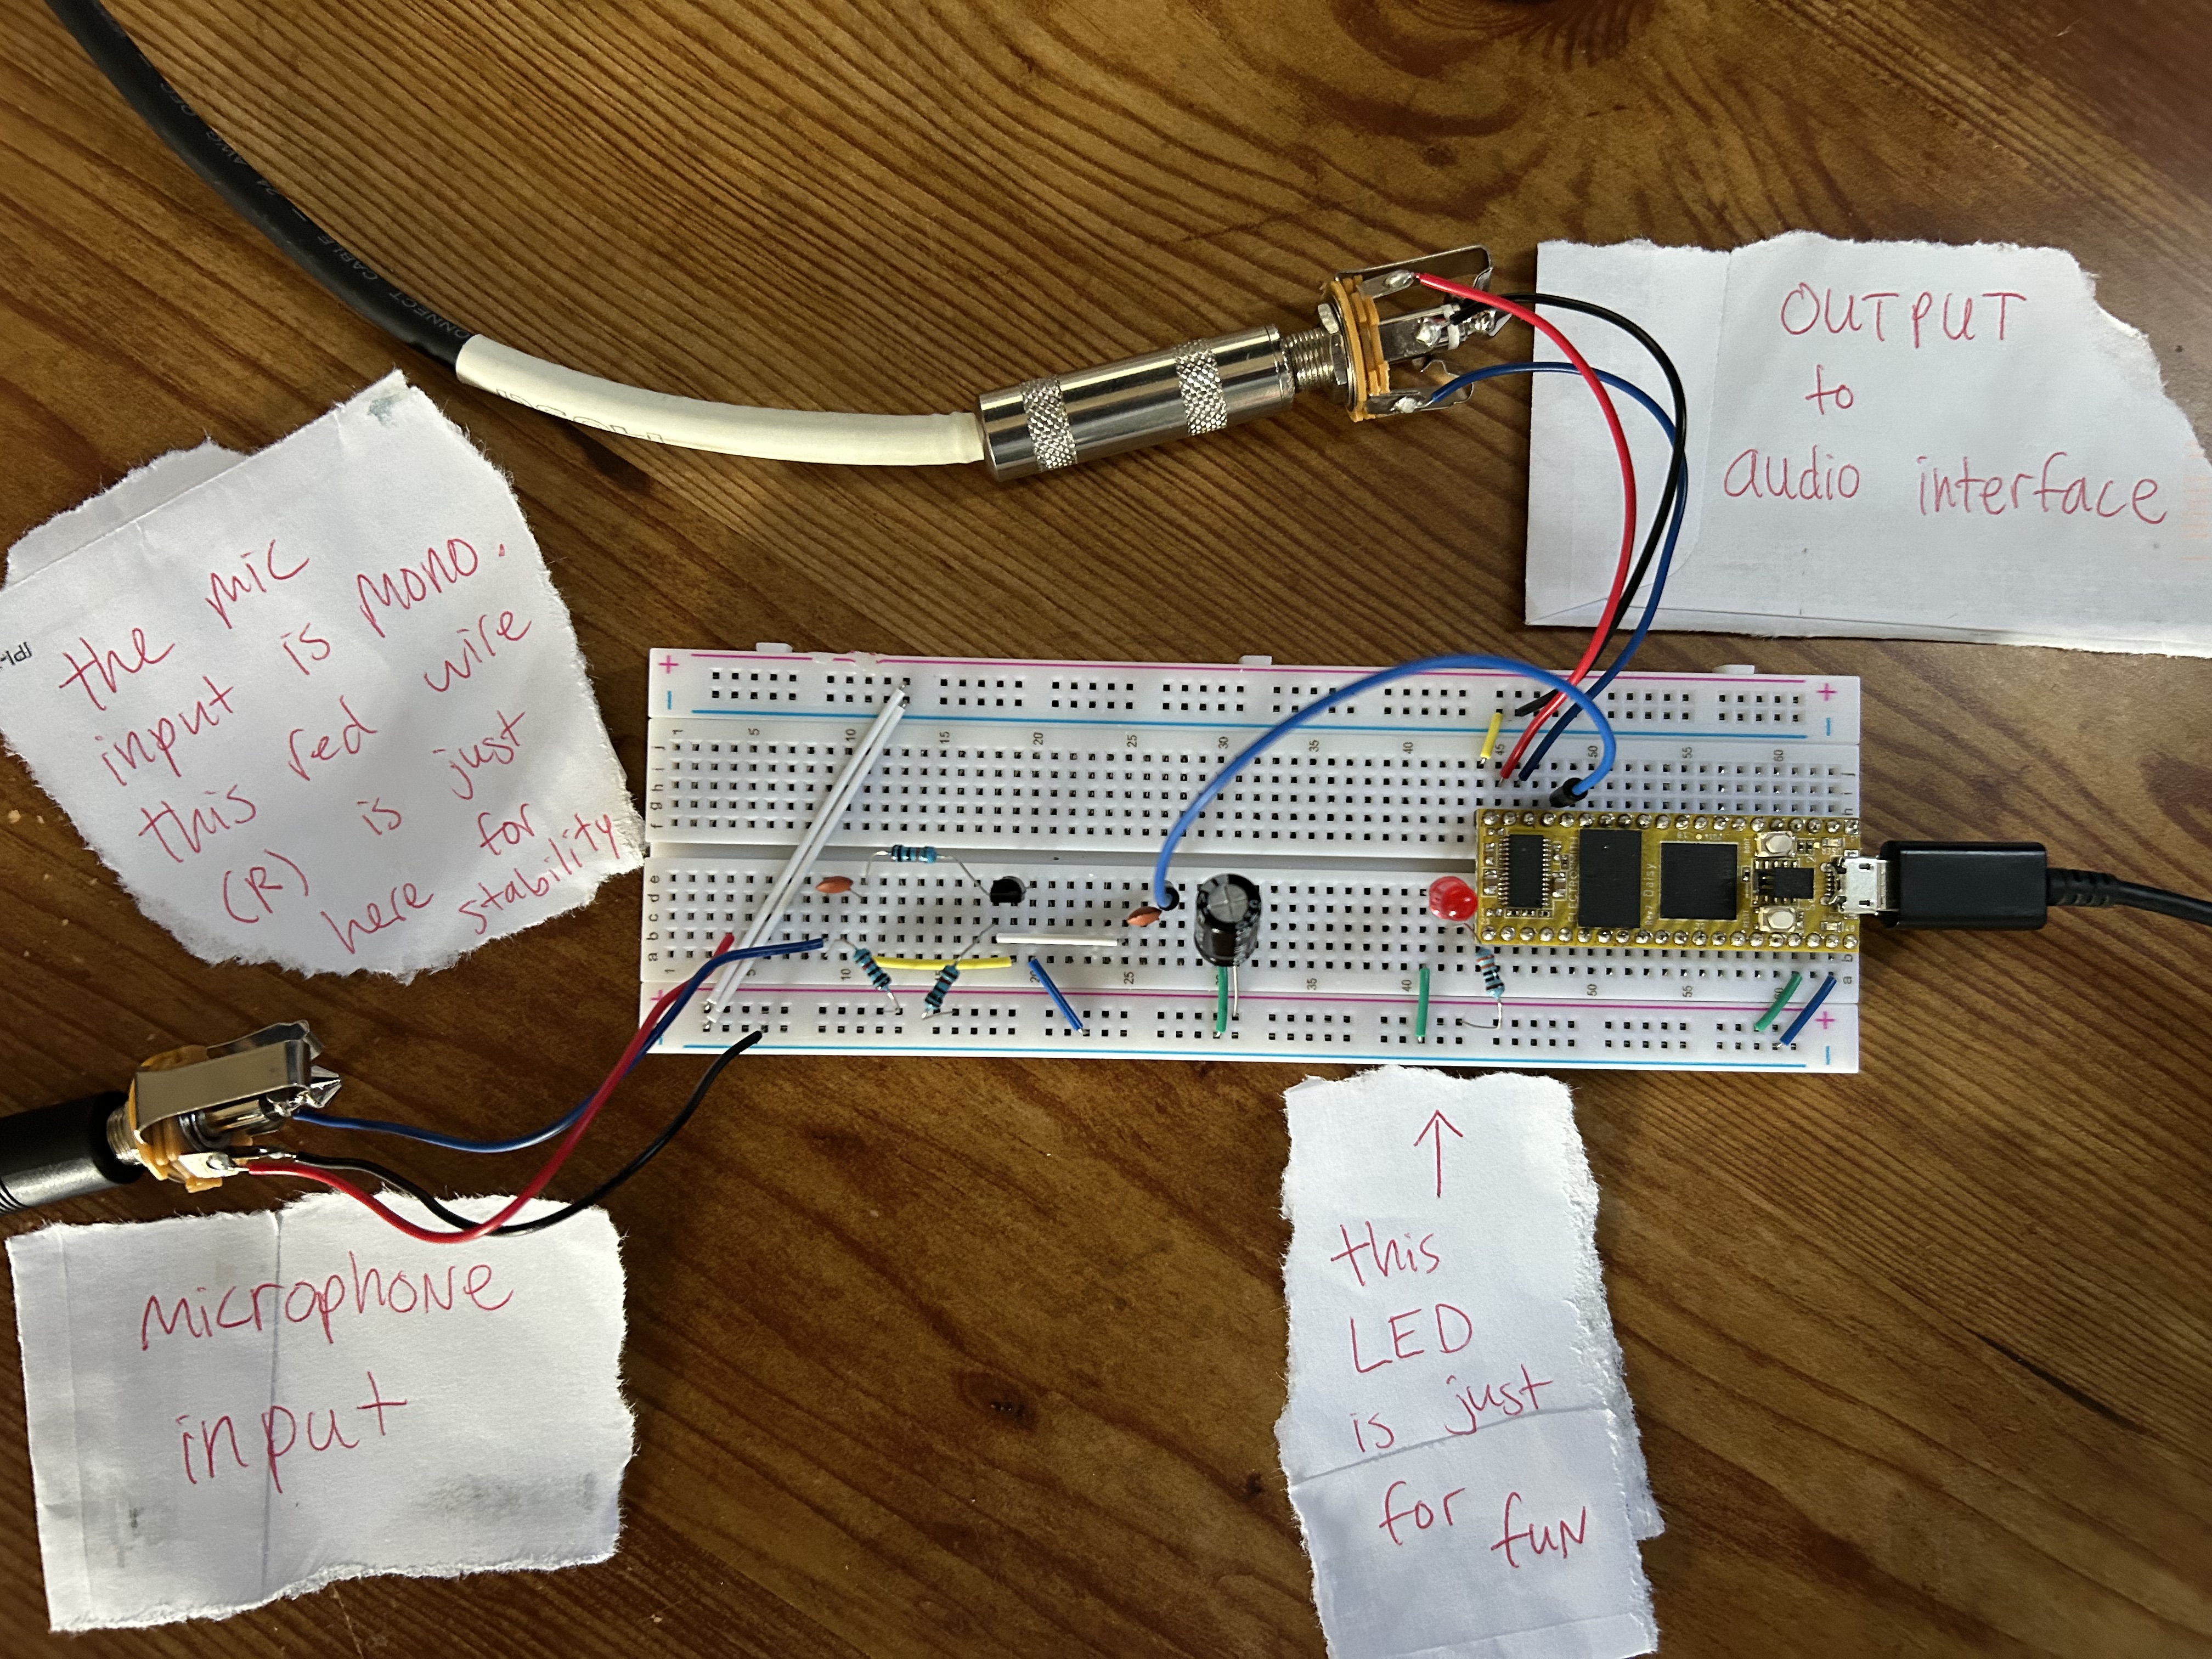
Here’s the final product on my breadboard:
Step 3: Test Output with Bypass Program
Before I got started on the vocoder program, I wanted to test the hardware. An easy way to do this is with a “bypass effect”, where I simply pass the input signal to the output without changing the sound.
I used the bypass example from the DaisyExamples GitHub repo.
Step 4: The Vocoder Program
Now that I had a working bypass effect (and preamp), I was ready to write the vocoder.
But first, I had to (sorta) understand how a channel vodoer works. I found the following conceptual diagram from this blog:

I won’t go thru the program line-by-line, but instead point out a few implementation details.
- The modulator signal is the microphone input, and the carrier signal is a
HarmonicOscilator. I played around with using a synthesizer input as the carrier with even worse results. - I used
Svffor all the filters. For the band pass filters, it was a matter of processing the signal, then grabbing the result viafilter.Band(). Same goes for.Low(). - I create two sets of filters for every frequency range, one for the modulator and one for the carrier. I had issues when trying to use the same filter for both frequencies, I guess because when the signal is processed it changes the state of the filter object?
- I added a small amount of delay to the final signal, it felt a little less choppy on word endings.
- When adding higher frequencies, I wasn’t able to hear anything, so I didn’t use any band higher than 5000 kHz.
All the code can be found here.
Step 5: Try it Out!
Once completed, I flashed the code via VS Code + DFU to the Daisy. I plugged in my mic to the preamp, then connected the audio out to my audio interface. It’s far from perfect, but does resemble a vocoder to some degree.
Here’s a small sample:
If you have any ideas to improve the design and/or code, please open an issue on the repo.
Thanks already to Nate on the Daisy Discord for suggesting I raise the frequency of the final low pass filter, it made a big difference!